View Cart
Print and Cut with Silhouette SD
This tutorial will show you how to print and cut with your Silhouette SD cutting machine from Sure Cuts A Lot. To Print and Cut, you will design a project in Sure Cuts A Lot, print with your regular printer, and then take your printed paper and feed it into the Silhouette for cutting.
This tutorial will take advantage of the optic scanner in your Silhouette machine to find special registration marks on your printed paper to help cut more accurately.
1. First create your design in Sure Cuts A Lot. For the mat setup we recommend you change the orientation to Portrait from under the Cutter menu or in the Properties window so that the Arrow on the edge of the mat points up. You should also set the paper size to 8.5"x11" under the Cutter menu or in the Properties window as well.
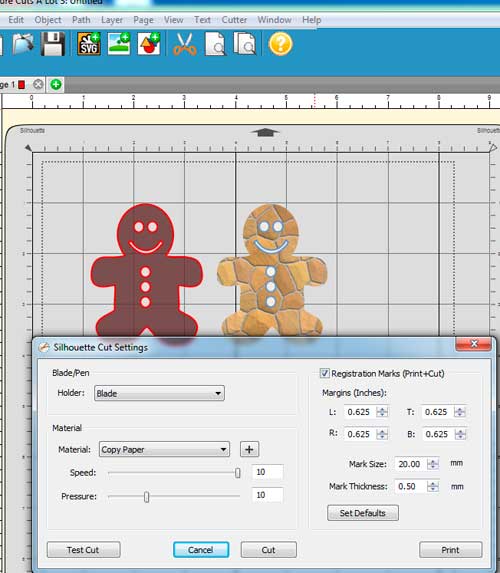
In this example we have added two gingerbread men, where one is filled with a solid color and the other is filled with an image pattern.
2.
When you are done with your Design, choose to Cut the project and it will show the Silhouette Cut Settings window. For Print and Cut, check the "Registration Marks" option and then choose "Print" to print your design with your printer.
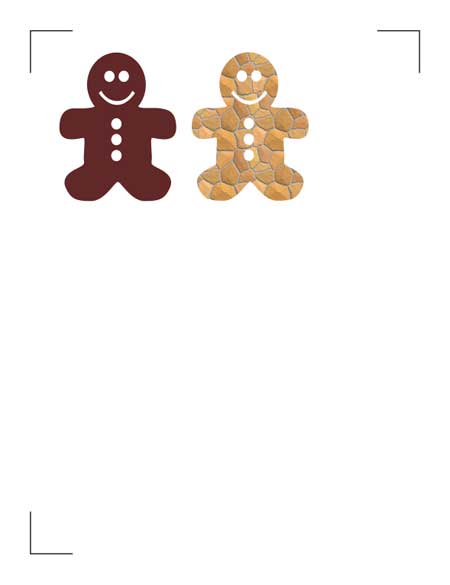
3. Your printed paper will print L shaped registration marks in 3 corners of the paper like the one shown below.
4.
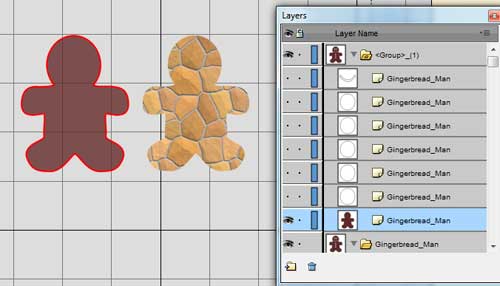
Now it is time to cut the printed paper with your Silhouette. This example will assume you do not want to cut out the holes where the eyes, mouth and buttons are, so we will hide or remove those outlines so they don't get cut. Whatever outline is shown on the mat, is what will get cut, so in this example, it will only cut the outer outline of the gingerbread man.
If the outlines are in separate layers, you can hide those
layers in the Layers window so those item won't get cut .
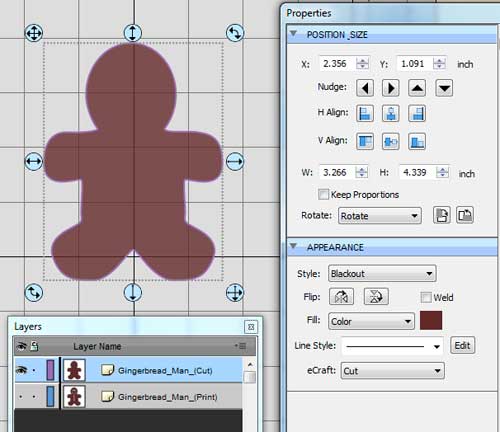
If the outlines are not in separate layers, you can do an Edit -> Copy and then Edit -> Paste in Place so that it makes a copy in a new Layer in the same location. Then change the Style in the Appearance Section of the Properties window to Blackout which will remove the inner items (eyes, mouth, buttons). Then hide the original layer that has the gingerbread with the eyes, mouth and buttons so that only the Blackout version is visible.
5. Choose Cut to bring up the Sihouette Cut Settings window again. Keep the Registration Marks checkbox checked, so that when you hit the Cut button, it will inform the Silhouette to look for those registration marks on the printed paper before it actually starts to cut the outline.