How to batch convert SVG to ScanNCut FCM
This tutorial will show you how to batch convert SVG files to ScanNCut FCM files to use with the Brother ScanNCUt machine.
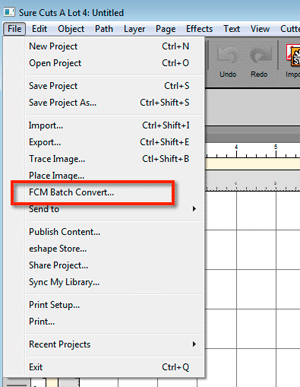
First choose the FCM Batch Convert option from the File menu.

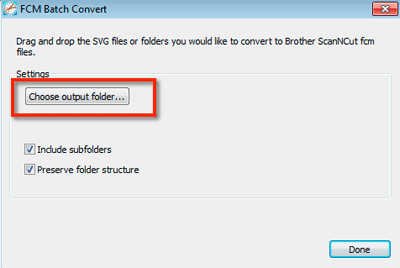
Next click the
Choose output folder to select where you want the converted FCM files to be saved to on your computer.
The
Include subfolders and
Preserve folder structure options can be used if you are going to convert a folder of SVG files.
Include subfolders will convert files that are in any subfolders within the main folder you are converting. If this option is not checked, it will only convert the files found directly in the main folder.
Preserve folder structure will maintain all the subfolders found when it outputs to your chosen output folder. if this option is not checked it will not add any subfolders to the output location and just place all converted FCM files directly in your chosen output folder.


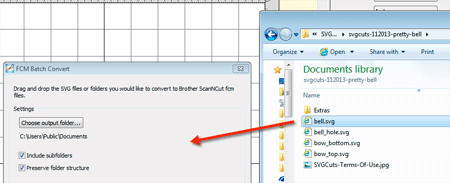
You can now drag and drop SVG file(s) or a folder containing SVG files and will start to convert them to FCM.

When conversion has begun, you should see a progress bar, and after it has finished, you should be able to find the converted FCM files in the output folder you chose.


